Family trips

Our little princess Abigail has been traveling with us since 4 months old. Stay tune for more of our family trips!

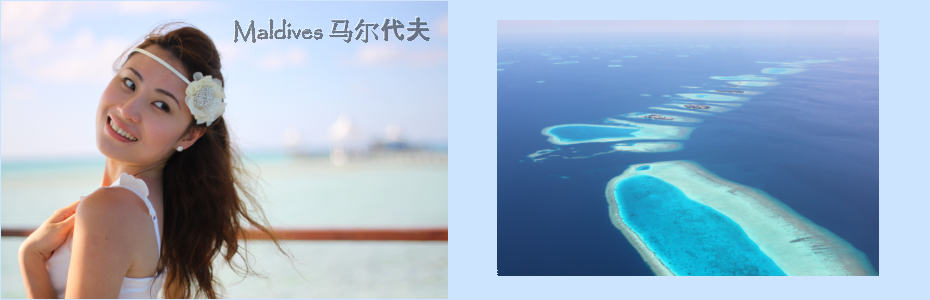
Honeymoon in Maldives

A place where romance begins... And there is never a blue as beautiful as the waters of Maldives!

Sinchow Vietnam!

Go to Vietnam. Indulge yourself in the peaceful Hmong villages in Sapa, or experience cruising at The New 7 Wonders of Nature - Halong Bay.

Go West to U.S.

Napa Valley! San Francisco! And Monterey!.

Bali oh Bali~

We've done it 3 times!! Couple trip 2009, friends trip 2010, and family trip 2014.

Hello Macau, the oriental Portugal

Walking the oriental Europe. Remember to taste the most authentic Portuguese tarts!.

London

I was just a touch-and-go tourist in a short 3 days...

Babymoon in Boracay

Sea, sand, sun. And a new family member in my tummy!

Marrakech, a hidden jewel

Of palm groves, fire dancing, and dromedaries.

Siem Reap - day and night

Back to the ancient kingdom and find the tomb raider in you.

Home Cooking

Just some recipes and home cuisine for my family and baby.

Welcome to my blog!! 欢迎到访!!

No matter how you get here, I wanna say a big THANK YOU for visiting my blog. Do come back often for more! Blessed because we're given the chance to share. Thank you for visiting! 无论你是刻意或者不刻意的来到这里,都进来坐坐、聊聊天吧。幸福不是必然的,而是懂得分享人生的喜悦。谢谢到访!


Showing posts with label Princess Abigail. Show all posts

April 16, 2015

Japanese Cheesecake with Philips AirFryer


This round I tried experimenting the Philips AirFryer with another of my favorite cheesecake. I followed exactly the ingredients and instructions in Christine's Recipe, except the baking temperature and baking time due to different oven used. They turned out to be fluffy and creamy as expected!!!

Before the first batch cooled down, 4 cupcakes already gone missing... I chilled and refrigerated all and today they taste even better!


Recipe makes around 28 mini cupcakes.
(I made 24 mini cupcakes + 1 small baking pan size block)

Ingredients:
250 ml milk
250 gm cream cheese, cubed and softened at room temperature
60 gm butter, softened at room temperature
6 egg yolks
55 gm cake flour
20 gm corn flour
1 lemon zest
6 egg whites
1/4 tsp cream of tartar
130 gm caster sugar

Tips: Make sure all your ingredients are at room temperature before you start.


Method:
**Preheat the Philips AirFryer to 150deg C for about 5 minutes.
1. Use a large bowl, pour in milk. Place the bowl over simmering water. Don’t let the bottom of the bowl touch the water. Add cream cheese, stir occasionally, until completely dissolved and the mixture turns smooth (double boil method).
2. Stir in butter, till dissolved. Remove from heat. 
3. Let cool down a bit, then add the egg yolks and combine well. (Note: Make sure the mixture is not too hot to avoid cooking the egg yolks at this stage.)
4. Combine cake flour and corn flour. Sift in the flours into the cream cheese mixture, a small amount at a time. Mix well between every addition, and make sure there aren’t any flour lumps. Stir in freshly grated zest. Set aside.
5. Place egg whites in a large clean bowl. (Note: Make sure there’s no oil or water in the bowl at all.) Use an electric mixer to beat the egg whites for 3 minutes, then add cream of tartar and blend again. Pour sugar in the egg whites and blend until very stiff peaks form. Use highest speed.
6. Fold-in the egg whites into the cream cheese mixture gently with a rubber spatula.
7. For a better result, fold in egg whites with a small amount at a time, at least for 3 times.
8. Fold-in just until all ingredients are incorporated. Do not stir or beat.  


Bake with pan
Pour the mixture into a small baking pan. I use a baking pan which can fit into the Philips AirFryer. I add hot water in the lower tray up to the level near the mesh metal basket (water-bath method). Bake for 15-20 minutes. Test with a needle or skewer that comes out clean. Slide out the basket and leave it 5 minutes. Remove the cake from the pan. Let it cool completely on a wire rack, then chill in the fridge for hours. I chilled overnight.


Baking into cupcakes
For the remaining mixture, I baked into small cupcakes. Test with a needle or skewer that comes out clean. Slide out the basket and leave it 5 minutes for each batch (one batch yields about 7 cupcakes). Cool completely on a wire rack, then chill in the fridge.


Side note:
Some of the cakes shrink a little due to rapid cooling for certain batch.. But overall the surface didn't crack. :)

April 8, 2015

Hokkaido Chiffon Cupcakes with Philips AirFryer

*Scheduled post*

Hokkaido Chiffon Cupcakes 北海道戚风杯蛋糕

Obviously I've been missing in action from blogospheres for months due to my second pregnancy... And surprisingly my second girl in the tummy started triggering mommy to go back into kitchen for foodie experiments after the first trimester. She even 'urged' me to add some new tools and did I get this Philips HD9220/56 AirFryer with Rapid Air Technology during the special staff sales weeks ago at only RM699 (cheap right? =D)

So far I've experimented with chips, wedges and even dinner rolls (all succeeded but I was lazy to post). This round I am so eager to try baking the Hokkaido Chiffon Cupcakes. And I guess I'm the first one to do it with an airfryer, so it's solely trial and error haha~ I did a bit of adjustment on the temperature and baking time, basically lowering the temperature and also shortened the baking time (you can see from the pictures below to see the difference).

There are so many recipes available and shared around the blogospheres and on FB. You may Google it on your own as I didn't really follow exactly any one of them because I used Philips AirFryer instead of the conventional oven. Seriously I've never baked a cake using an oven before... but then at least I succeeded this first time baking mini chiffon cakes which can be considered soft and fluffy enough.

I didn't make the custard cream filling as well but just use some ready custard powder. No ready whipping cream available in my fridge so I just make use of whatever I can find in the kitchen. Indeed the taste was good after I chilled the cake overnight!


Recipe makes 12 mini cupcakes.

Ingredients:
For the cupcakes:
3 eggs, separated
50g caster sugar (separate into 2 portions of 25g each)
35g vegetable oil - I used canola oil
60g milk
70g cake flour, sifted

For the filling:
2 tablespoon of custard powder + 2 tablespoon of milk (mixed)
1 cup of milk
25g caster sugar

For finishing:
Fresh fruits (I use plum)
Icing sugar to dust

Tips: Make sure all your ingredients are at room temperature before you start.


Method (For the cupcakes):
1. Use hand whisk to whisk the egg yolks and sugar till pale in color. Whisk in canola oil and milk, mix well. Add sifted cake flour and whisk till the egg yolk mixture is smooth and well combined.
* I heated up the canola oil and milk before adding in to the mixture. Got the tips from Awayofmind Bakery House.
2. Instead of using the electronic mixer, I use hand whisk to whisk the egg whites and the sugar (I just come to realize that I lent my electronic mixer and yet to get it back.. ouch my hand!!). Whisk the egg whites until stiff peak.
3. Take 1/3 of the egg white mixture and add it to the egg yolk mixture. Mix until combined. 
4. Fold in the remaining egg white mixture to the egg yolk mixture. I did it in 3 rounds.


Method (For baking):
1. Preheat the Philips AirFryer at 170degC for 5 mins.
2. Fill up 3/4 of the cupcake linear. Bake in preheat oven at 170degC for 20 mins (I see some of the original recipe bake in 170degC for 20 mins, so I just tried if it works but it turned out to be overbaked...taste like normal cupcake which is harder in texture.)
3. The second batch I switched the setting to 150degC for 15 mins.
4. At 10 mins I started to monitor the cupcakes by sliding out the basket and check the appearance. I poked a chopstick into the middle to check. It seemed to be almost done at 12 mins! Somehow I lowered the temperature to 120degC and left them baking for another 3 mins until the timer is up.
5. Leave cake to cool down completely before piping in the filling.


Method (For the filling):
1. I used ready custard powder and follow the instructions to make the mixture.
2. Heat 1 cup of milk and add 25g of caster sugar. Bring to boil.
3. Lower the heat to medium, then add in the custard mixture and stir till it thickens.
4. Set aside and let it cool down before fill up to the pipe.


Finally....

Make a hole on the cupcake (I already poked a hole when checking them out in the oven) and pipe in the custard filling. Last but not least, dust them with icing sugar and garnish with fruit (I used plum).

Chill in the fridge (I chilled overnight) and ready to serve!!

Tadaaa~ My first attempt of chiffon cakes. Although I know that they're not the softest nor fluffiest but still they taste great!!

Chilled Hokkaido Chiffon Cupcakes ready to serve~


Happy trying if you have a Philips AirFryer too!

October 1, 2014

Homemade sushi for dinner!

28th August, sushi night at home

I realized Abigail was enjoying very much the Japanese rice when we were in Japan, so I decided to make sushi for dinner in one of those not-so-busy working day. Well...we miss eating Japanese food too... so ended up I took half day off to do the preparation. 

I had gathered some of the ingredients during weekend grocery shopping, and what's left to buy were Unagi and Salmon sashimi. Left company around 2pm, grabbed the fishes and reached home at 4pm. Ingredients preparation took me another hour plus. So I only started wrapping the sushi near 6pm, just in time for dinner.

The very last time I made sushi was back in year 2002 (wow that was really long ago!), and I had lost my cookbook... So this round I just base on gut feeling on the sushi wrapping hehe.

Ingredients:
Rice
3 rice cooker cups* (540ml) of uncooked Japanese rice* (I use Sumo Calrose Rice)
Water (follow instruction on the rice sack - 2 cups of water to 1 cup of uncooked rice)

Sushi Vinegar
⅓ cup (80 ml) rice vinegar
3 tbsp. sugar
1 ½ tsp. salt

Method for cooking sushi rice:
1. Rinse the rice in a strainer or colander until the water runs clear. 

2. Scoop the rice with your palm and gently rub them against each other. This is polishing. Rinse and discard water. Repeat this process 1-2 times.

3. Let the rice soak in water for 5 minutes. Drain out the water and transfer the rice into the rice cooker bowl. 

4. Add cold water following the instruction on the rice sack. Different brand may differ for the amount of water needed. The brand of rice I use is Sumo Calrose Rice, it requires 2 cups of water to 1 cup of uncooked rice. Start cooking.

5. For making sushi vinegar, combine the rice vinegar, sugar, and salt in a small saucepan. Bring it to a boil over medium high heat until sugar is completely dissolved. Set aside to let it cool.

6. When the rice is cooked, moisten a large bowl with water so the rice will not stick. Transfer the cooked rice into the bowl and spread out evenly to let it cool faster. 

7. While the rice is still hot, add the sushi vinegar over the rice. Use a rice paddle to slice the rice to separate the rice grains instead of mixing. Gently flip the rice in between slices. Repeat until rice is cooled.

8. Keep the rice covered with a damp towel until ready to serve or wrap.

Method for wrapping a maki sushi:
1. Some of the ingredients that I prepared for wrapping the nigiri sushi and maki sushi - carrots, Japanese cucumber, tuna spread, salmon, corn, egg mayo, crab sticks, etc...


2. Place a sheet of seaweed your sushi mat, with the rough side facing up. Spread a ball of sushi rice on top, evenly cover from the near edge to about an inch from edge. Keep your hands wet with a mixture of water and rice vinegar. 

3. After that add the ingredients that you like onto the center part, then top up with more rice.
Place them in a line, starting on the near edge of the rice layer. Some common maki ingredient combinations:
Basic tuna or salmon roll: These rolls typically just have just tuna or salmon rolled up, without any other ingredients.
Ahi roll: Yellowfin, cucumber, daikon, avocado.
Shrimp tempura roll: shrimp tempura, avocado, cucumber.
Phoenix roll: salmon, tuna, crab sticks, avocado, tempura batter (fried).


4. Hold the edge of the mat with your thumbs. Start with the edge that has your first ingredient next to it. Lift the seaweed sheet and fold it over the first ingredient. Make sure to keep the ingredients in place and that the rice sticks together.

5. Continue to roll. Tuck the front edge of the seaweed sheet into the roll, and remove the mat as you continue to roll the sushi. Roll slowly to ensure sushi coming out even.

6. Tighten the roll afterwards to keep ingredients from falling out when we cut it. Just roll it back and forth in the mat to tighten and seal it.

7. Allow the roll to sit for a minute or two before cutting it. Seaweed sheet will lightly moisten from the rice and less likely to tear.

8. Cut the roll into sixths or eighths using a sharp, wet knife. 


So these are some of the sushi I made. For the nigiri sushi, just take a small amount of sushi rice (about 3/4 the size of your palm), roll and squeeze it together until it rolls into a firm "log" sized rectangle. Then place a dab of wasabi on one side of the fish slice and then place the fish on the rice "log", with the wasabi side on the rice. Done!


I even made some really small ones for Abigail. Aren't they cute?


Besides sushi we also cooked Japanese Curry. Bought the curry from our recent Japan trip, so decided to make some good food with it. Topped up with unagi~


Last but not least, udon!


That's her second dinner after a bowl of porridge. No doubt my little lady has very good appetite at night...


September 18, 2014

Caramel Apple Banana puffs


This is actually an upside-down cake recipe that I modified from Cuisine Paradise. It is meant for baking using my Happy Call Pan, but I modified the ingredients and use steaming instead. I was so happy to be able to get back home earlier yesterday and do some snacks for my little lady. She is a picky eater who is still a vegetarian thus far... I really have problem to make her take meat! There's so many recipes that I thought I can try out but she would reject right away once she tastes meat texture. Somehow she's a fan of pastries, so most of the recipes I try are pastries.


Puff ingredients:
180g Self Raising Flour
3 Teaspoons Baking Powder
4 Large Egg
60g Organic Molasses Sugar
1/2 Teaspoon Vanilla Extract
Grated Rind of 1 Lemon
60ml Unsalted Butter, Melt
60ml Grape Seeds Oil

Caramel Apple Banana ingredients:
50g Unsalted Butter
60g Organic Molasses Sugar
50ml Water
2 Green Apple, skin remove and cored
1 Small Banana, skin remove
1 Tablespoon Lemon Juice
60g - 80g Golden Raisins


Method:
1. To prepare the Caramel apple banana; sliced the apple and banana into about 0.5cm thick, lightly marinate it with lemon juice. Set aside.

2. Simmer unsalted butter and organic molasses sugar over low heat until sugar dissolve and mixture begins to bubble.


3. Stir in marinated apple slices, water and continue to simmer over low heat for another 3 - 5 minutes till apple and banana slightly soften. When done, turn off the heat. Set aside and prepare the cake batter.


4. In a medium mixing bowl, whisk together eggs, organic molasses sugar and vanilla extract with a hand mixer till well-mixed (about 1 minute).


5. Next whisk in the melt butter, grape seeds oil and follow by the sifted flour mixtures (self raising flour + baking powder) and continue to stir until the flour is in-cooperate into the batter.


5. The batter will be slightly like thick cream texture before stirring in the remaining golden raisin.


6. Pour the mixture over the silicone mould prepared. Smooth the top and add in the caramel apple banana.


7. Steam it for 15 minutes until a skewer inserted and come out clean.


My cute little Hello Kitty Caramel Apple Banana puffs! Nicely done for my little Hello Kitty fans.


Needless to say she's excited over it and had one as supper~ Remaining were kept as breakfast and snacks for the next day.


August 18, 2014

Merry-go-round 旋转木马


Just couldn't resist her cuteness and not to post it! 

June 5, 2014

Yea I AM ONE!! Princess Abigail's 1st birthday


I would just come to realize that this was suppose to be posted 5 months ago! Today my princess Abigail is exactly 17 months old. Wow... I mean WOW... Has she grown so fast???!!! Or have I grown so much older... It was like yesterday when she was still a small baby.

Her full moon


Now the term is TODDLER~ Very soon we're gonna have to pay a lot more for her flight tickets... No more traveling as an infant but as a kid.


Having the first birthday celebration for the first child is definitely a project for the mom. I bet a lot of you have gone through sleepless nights getting the preparation done. I was totally a walking zombie in Dec'14 when getting ready for Abigail's party... a full time working mom + breastfeeding mom + my mom at her final stage of cancer (that was really sad). Days were spent on rushing to work, rushing to hospital, and rushing for the party stuffs. And when I think back, I realize that I was crazy enough to even DIY most of the items!

I came out with the theme of "Safari Princess", where the party was filled with cute pastel color baby animals to accompany my girl the princess. She is one active girl who would not really fit into the normal princess theme, thus I added in the "safari" element.


These were all hand made DIY decorations. Thanks to my aunt, the best aunt on earth I would say, for helping me out with the arts and crafts. Stage deco done by the superb papa and Abigail's uncles on the spot!


And this was the awesome birthday cake made by JooSing from Cupcakes4you!! Highly recommended for those who stay in Penang. Yes it was my idea on the cake design and she made it into an actual cake.


And tadaa~ This is my handmade birthday hat for the princess! Who likes it give me a clap!~


Some snapshots of the birthday girl with friends and family. Thank you all for coming. :)


These photos below are the most precious photos of all time... Mommy we miss you.... We're really glad that you were still able to witness our little girl turning 1 year old.


And the presents... We spent an hour unwrapping them the next day at home.. Phew~


Love you to the max!!!

The mini me :)


Photo credits: LoveMomentsPhotography
Venue: Flamingo Hotel by the Beach, Penang

Reader's Track 读者追踪器